Mounting OCI Bucket as Filesystem
Just a curious learner, currently playing with technologies and sharing my learnings.
Hello Techies!
In this blog, I'll guide you how to create an OCI Bucket and Mount it as a Filesystem in Linux.
Creating an OCI Bucket
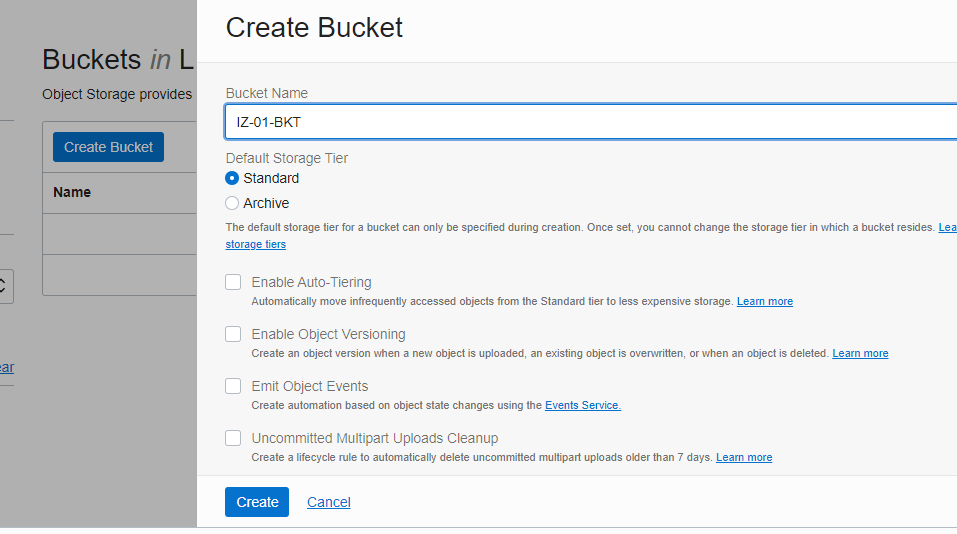
- Login to OCI console and navigate to Storage, then click on Buckets you will land on to OCI Bucket page. Click on Create Bucket option and enter the required details.
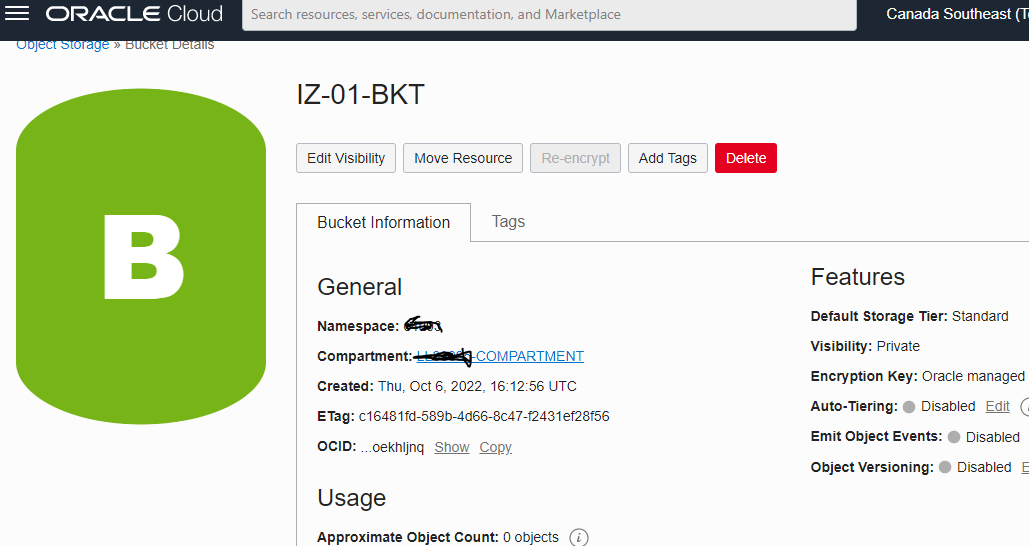
- After the Bucket is created click on the Bucket to see more details.
Installing required packages on Oracle Linux Servers
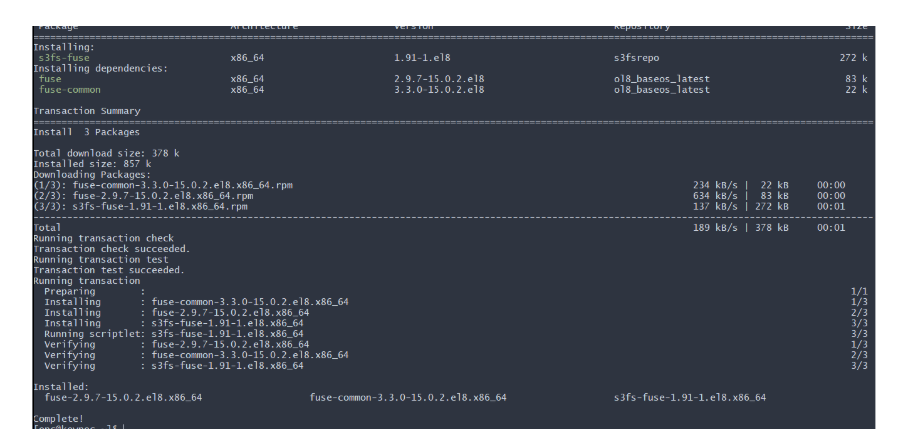
sudo yum install s3fs-fuse -y

Note: Incase you are unable to install the required s3fs package, you can follow the below trick to install.
sudo vim /etc/yum.repos.d/my_s3fs.repo

# paste the following content in the file (Note: the url mentioned may or may not be valid, copy the link from the epel public repo)
[s3fsrepo]
name=Repo for s3fs
baseurl=https://dl.fedoraproject.org/pub/epel/8/Everything/x86_64/
gpgcheck=0

# run the below command to check the output
sudo yum repolist
To mount the Bucket as file system we need Customer Secret
Follow the below steps to create customer secret:
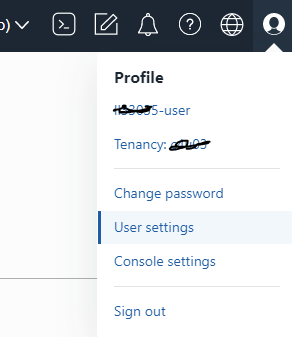
- Go to your OCI console and click on user home icon and then click on User Settings.
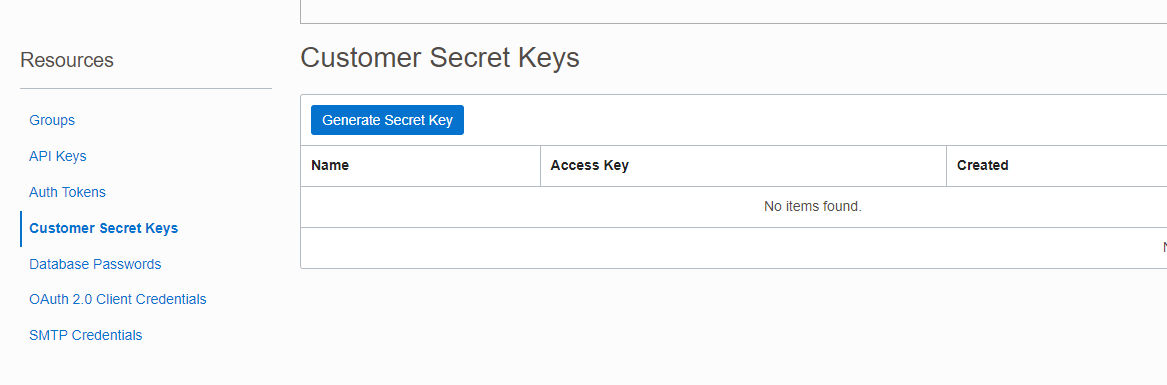
- Scroll Down and under resources section click on Customer Secret Keys
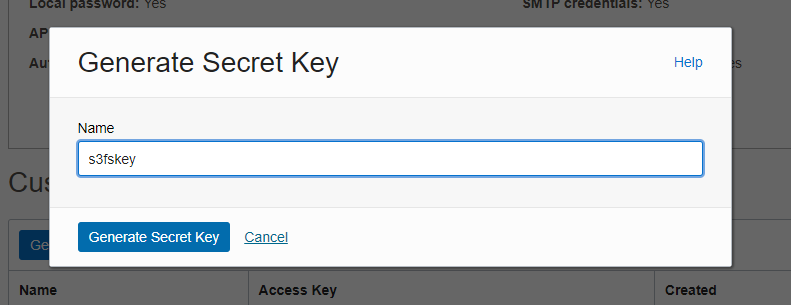
- Click on Generate Secret Key and enter a name say s3fskey to generate a new key for your requirement. Note, once the key is generated copy the key and paste it in a file, we will be using the key later.
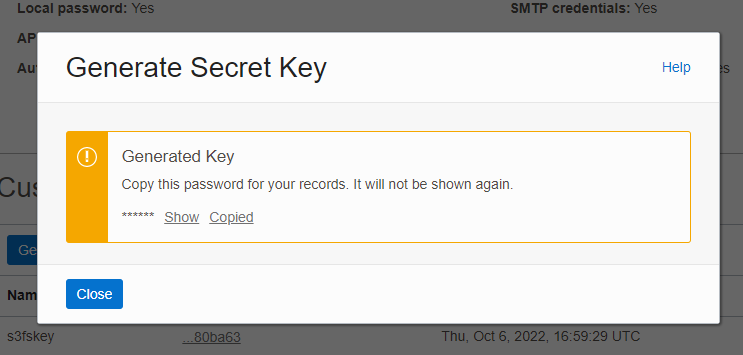
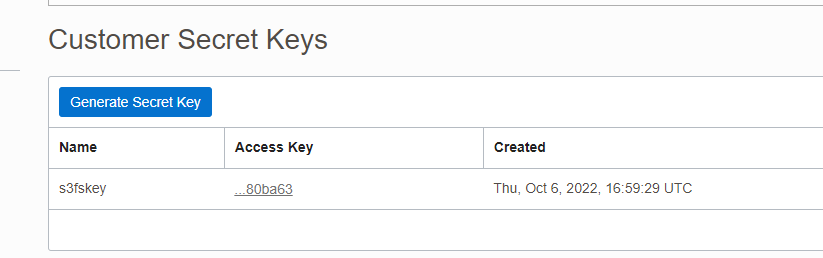
- After the Key is created, copy the access key and paste in the file.
- In the below path of server create a file and paste the access key and secret key as per below format
vim ${HOME}/.passwd-s3fs
  # paste the access key and secret as per below format (use colon as separator with no spaces)
  ACCESS KEY:SECRET KEY

cat ${HOME}/.passwd-s3fs

- Changing the created file permission.
sudo chmod 600 ${HOME}/.passwd-s3fs
ls -l ${HOME}/.passwd-s3fs
- Creating the mount point for Bucket
mkdir /home/opc/s3fs-poc-mnt
Mounting the Bucket to filesystem
After the above steps are completed, we need to run the s3fs command to mount it on server. To perfrom that steps we need to follow a s3fs mount command syntax as below:
s3fs <bucket name> <mount_poin> -o url=https://<namespace_name>.compat.objectstorage.<region >.oraclecloud.com -onomultipart -o use_path_request_style -o endpoint=<region>
- Example for above reference command
s3fs IZ-01-BKT /home/opc/s3fs-poc-mnt -o endpoint=ap-mumbai-1 -o passwd_file=${HOME}/.passwd-s3fs -o url=https://sidbcjkdsc.compat.objectstorage.ap-mumbai-1.oraclecloud.com/ -onomultipart -o use_path_request_style
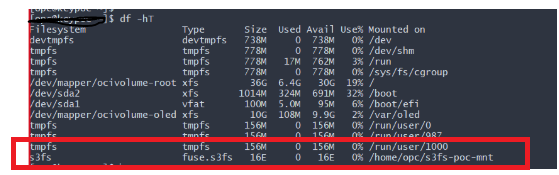
Note: If the above command is successfull without any error, you can see the mounted bucket using the below command.
df -hT
Testing the setup
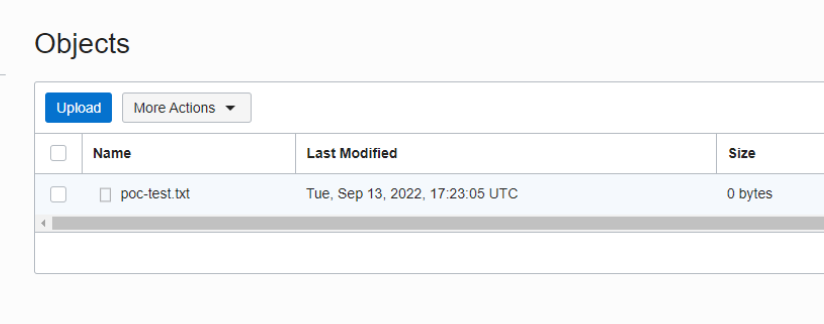
Creating a dummy file on the mount point, that must be visible on OCI Bucket.
# go to mount point folder
cd /home/opc/s3fs-poc-mnt/

# create a test file
touch poc-test.txt

# list it
ls -l

- Verifying the file on bucket, I use the ls -l to cross verify the timestamp of files both on server and bucket (if server time is configured on utc you will see the same result as below)
Thank you for Reading and hope you find it useful.